Step-by-Step Guide: Sending Emails from ASP.NET Core with Amazon SES
Email communication is a vital aspect of any web application allowing businesses to deliver important notifications and connect and engage with customers effectively. However, ensuring that your emails reach your users' inboxes reliably and avoid the dreaded spam folder can be a challenging task.
That's where Amazon SES (Simple Email Service) comes to the rescue! Amazon SES is a highly scalable and cost-effective email service offered by AWS, which is designed to handle all aspects of email delivery and management. By using Amazon SES in your ASP.NET Core applications, you can get excellent delivery rates, improved email engagement, and, most importantly, maintain a positive sender reputation.
This guide will take you through the process of setting up your Amazon SES account and integrating it with your ASP.NET Core application, enabling you to send professional and personalized emails hassle-free.
By the end of this tutorial, you'll have the skills and knowledge to create a robust email delivery system that ensures your messages reach their intended recipients effectively and reliably.
So, let's dive in and unlock the full potential of sending emails from your ASP.NET Core application with Amazon SES.
Understanding Amazon SES
Amazon SES (Simple Email Service) is a powerful and cloud-based email service provided by Amazon Web Services (AWS). It offers developers a robust solution for sending and receiving emails efficiently and at scale. Understanding Amazon SES is crucial to harnessing its full potential for enhancing email communication within your ASP.NET Core applications.
What is Amazon SES?
Amazon SES is a cloud-based email service designed to make it easy for developers to send both marketing and transactional emails without the need to manage complex email infrastructures. It provides a simple API (Application Programming Interface) that developers can integrate directly into their applications. With Amazon SES, you can send notifications, updates, newsletters, and other critical communications to your users reliably.
Key Features of Amazon SES
- High Scalability: Applications that require frequent email communication or have a big user base can benefit from Amazon SES's ability to handle large-scale email operations.
- Cost-Effectiveness: You only pay for the emails you send thanks to Amazon SES's pay-as-you-go pricing model, which has no minimum purchase requirements or up-front charges.
- Robust Deliverability: Amazon SES a variety of strategies to improve deliverability rates and ensure that your emails land in the inboxes of your intended recipients rather than the spam folder.
- Bounce and Complaint Handling: It automatically handles bounced and complaint emails, which helps maintain a positive sender reputation.
- SMTP Interface and API Integration: Amazon SES supports both SMTP and API interfaces, allowing you to choose the integration method that best suits your application's needs.
Use Cases for Amazon SES
Amazon SES is suitable for a wide range of applications and industries. Some common use cases include:
- Transactional Emails: Send emails for user account creation, password resets, order confirmations, and shipping notifications.
- Marketing Campaigns: Run personalized email marketing campaigns to engage and retain customers.
- Application Notifications: Notify users about activity updates, product releases, or important announcements.
- Automated Workflows: Integrate Amazon SES with AWS Lambda or other AWS services to trigger emails as part of automated workflows.
Pricing
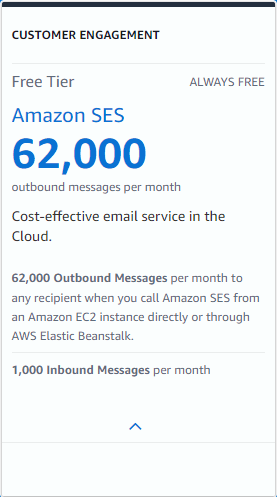
Amazon SES has a pay-as-you-go pricing model. However, the Free Tier is quite generous for you to try out. You can send nearly 200 emails every 24 hours for free (assuming you use an EC2 instance). In most circumstances, you will be charged next to nothing. Aside from that, you'll have to pay $0.10 for every 1,000 emails you send or receive, which is a pretty good offer. Each additional GB of data sent as an attachment will incur an additional charge of about $0.12.
Setting Up an Amazon SES in AWS Management Console
Let's go to our AWS Management Console and open up Amazon SES. This is how it would appear if you were to launch this service for the first time.
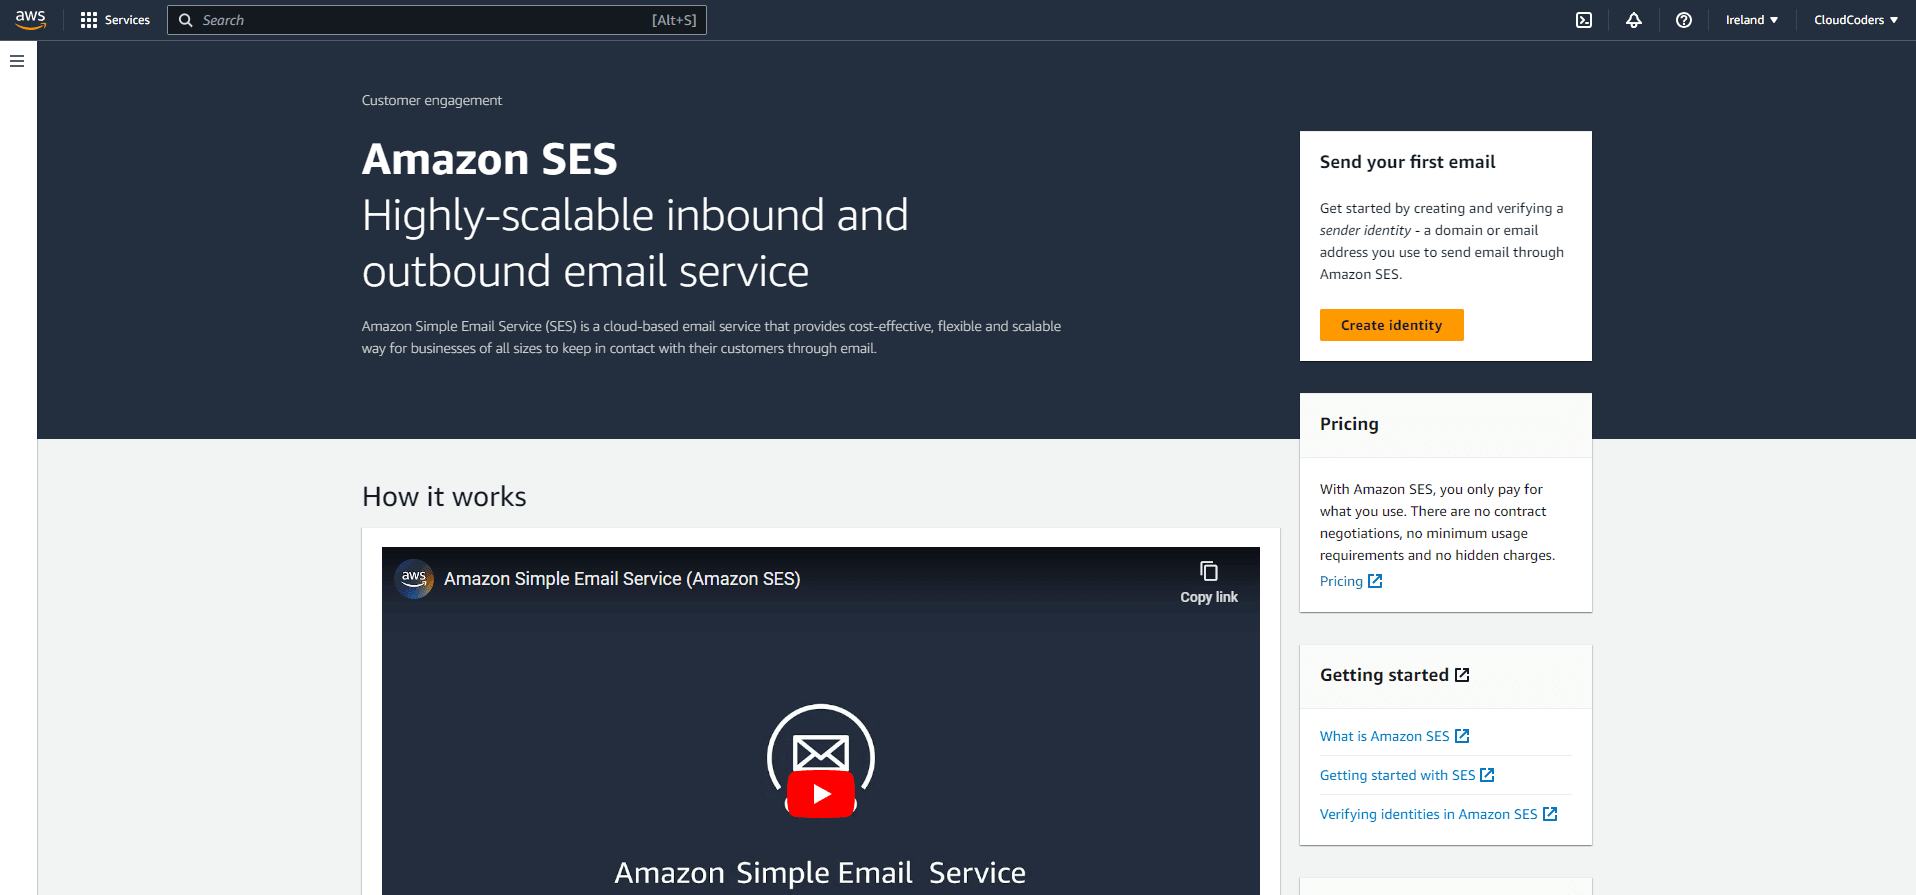
To start sending emails, we will have to create and validate a sender identity first, which is a domain or email address you use to send emails via Amazon SES.
Click on Create Identity.
For this demo, I will use an email address to create an identity. Make sure you have access to the mailbox as a verification email will be sent to this address.
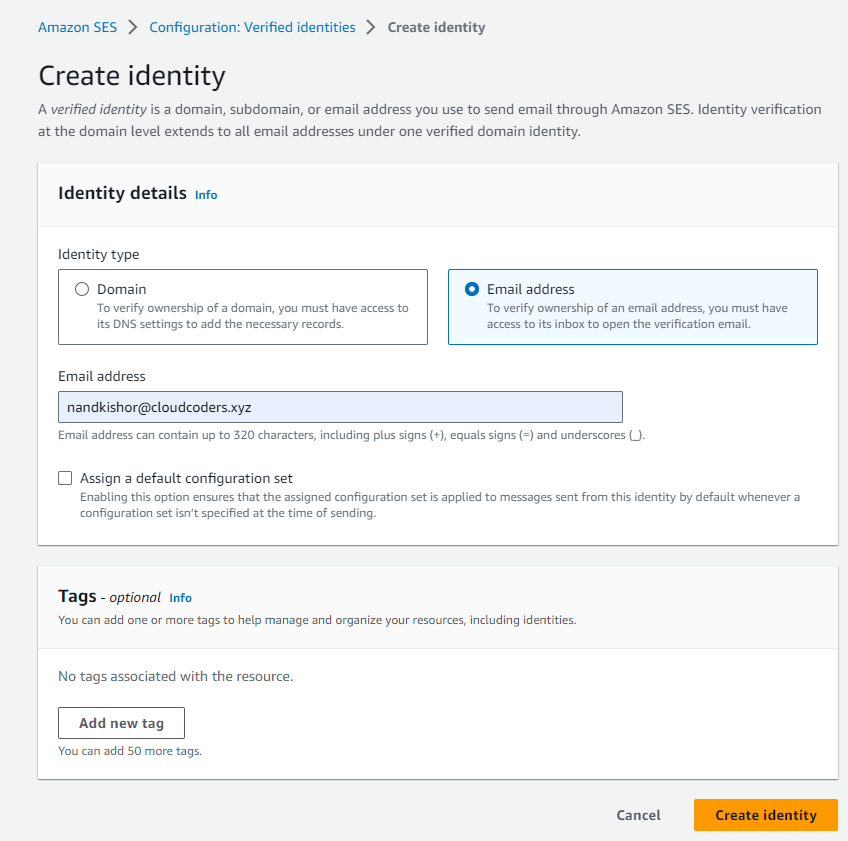
After creating the identity, a verification email will be sent to the email address that you have put above which will look like this.

Click on the verification link to verify the email address.

Now you can check the status of the identity in the AWS Management Console. It should have now a verified status.

Sending Test Email from AWS Management Console
Now that we have verified the identity, let's send a test email from the management console. The Amazon SES mailbox simulator lets you test how your application handles different email-sending scenarios. Emails that you send to the mailbox simulator do not count toward your sending quota or your bounce and complaint rates.
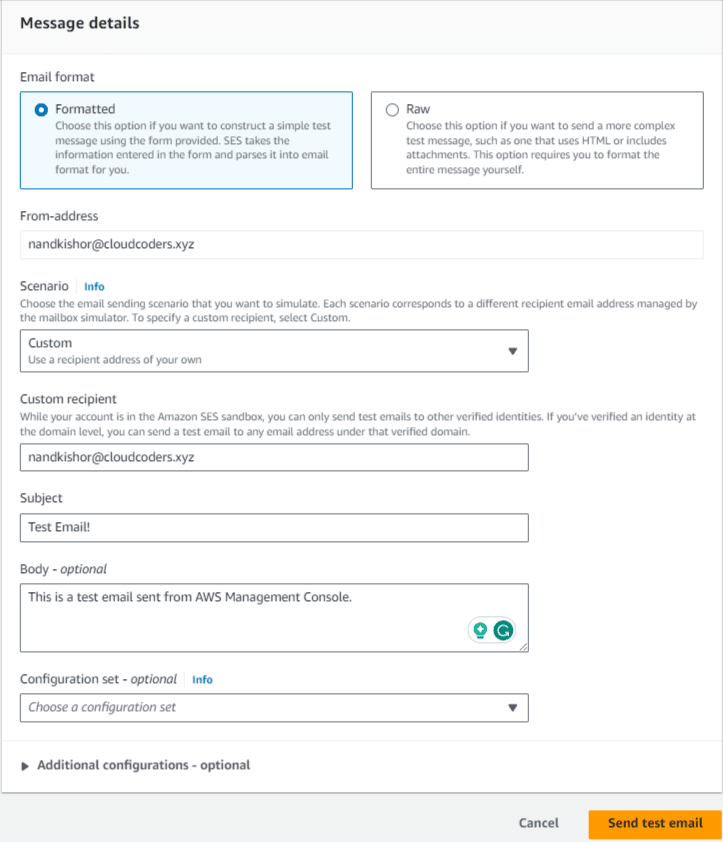
- Select the Email Format as Formatted.
- Select the scenario as Custom. This will allow us to input a custom recipient for testing purposes.
- Enter the Subject and Body of the email and hit the Send Test Email button.
Requesting production access in AWS SES
Your Amazon SES account is in the sandbox when you create it. To request full access to be able to send to any (unverified) email address, you can request production access from the SES dashboard.

Configuring Amazon SES in ASP.NET Core
We will be using the ASP.NET Core Web API project using .NET 6 to send emails.
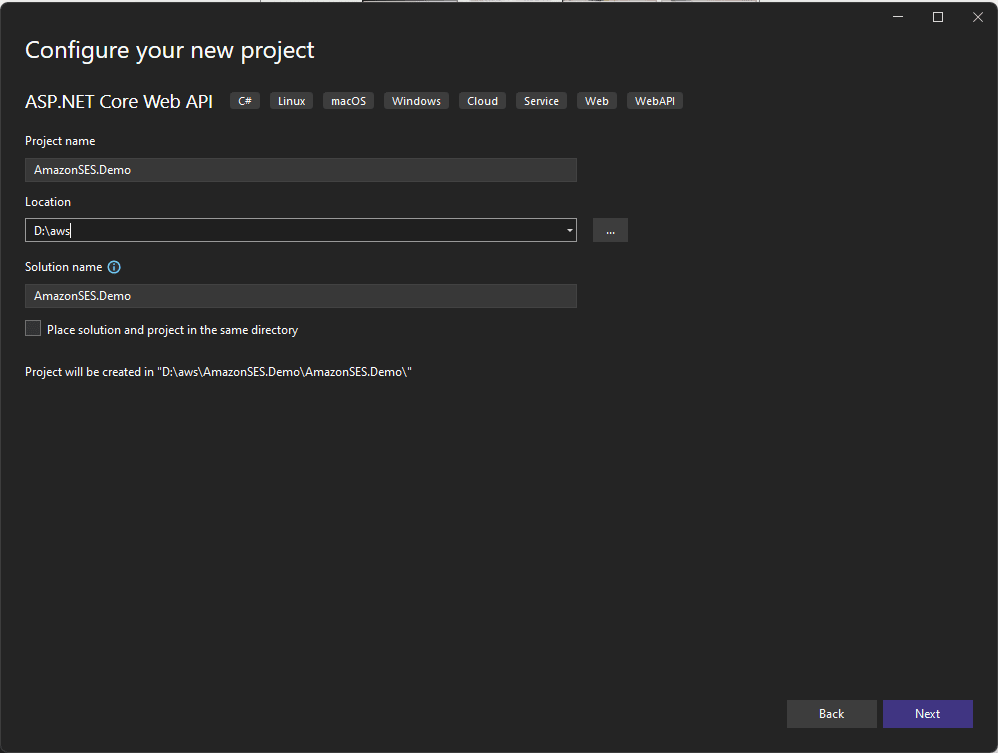
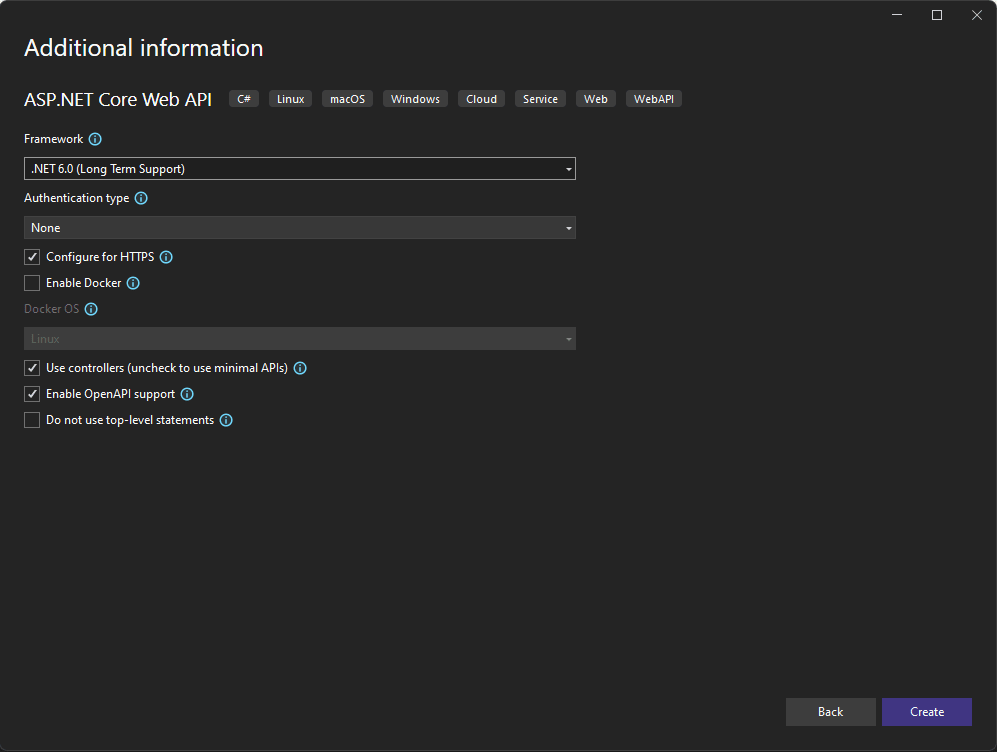
We can send email programmatically via two approaches: one is through the SMTP interface and the other is using the AWS SDK for .NET.
Sending Mail using Amazon SES via SMTP Interface in .NET
Our.NET Core API will need SMTP credentials (username and password) to log in with AWS SES in order to send emails.
- Navigate to the SMTP Settings from the left pane menu.
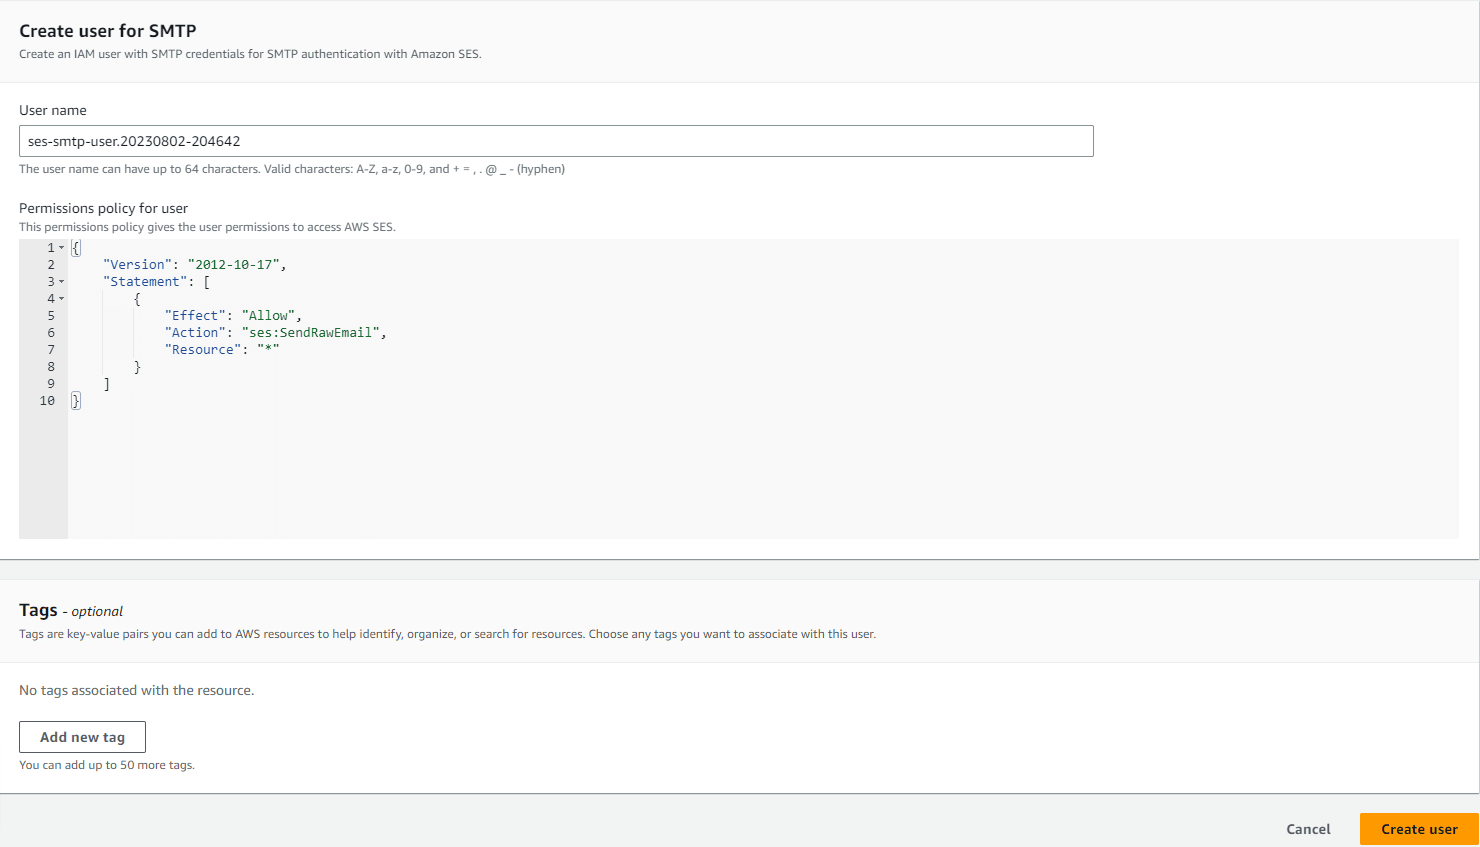
- Proceed to create your SMTP credentials by clicking on the Create My SMTP Credentials button. This action will redirect you to the AWS Identity and Access Management (IAM) section, allowing you to generate a new user with email-sending access.
- Click Create to create your SMTP credentials. You can modify the IAM Username or keep the default one provided by AWS.
- Click the Show User SMTP Security Credentials and then copy or download the username and password for use in the subsequent step.


Let's return to our Visual Studio and first install the necessary packages for your project.
Install-Package MailKit
Install-Package MimeKit
Create a new class named MailRequest.
public class MailRequest
{
    public string? ToEmail { get; set; }
    public string? Subject { get; set; }
    public string? Body { get; set; }
}
Next, create another class named MailSettings that will be responsible for loading configurations from the appsettings.json file.
public class MailSettings
{
    public string? Host { get; set; }
    public int Port { get; set; }
    public string? DisplayName { get; set; }
    public string? Mail { get; set; }
    public string? Username { get; set; }
    public string? Password { get; set; }
}
Now, let's configure the appsettings.json file with the following data. Replace the placeholder with your own data.
"MailSettings": {
  "Host": "<smtp server>",
  "Port": 587,
  "DisplayName": "<your name>",
  "Mail": "<ses identity registered mail id>",
  "Username": "<smtp username>",
  "Password": "<smtp password>"
}- Host – SMTP endpoint from Amazon SES SMTP Settings
- Port – 587
- Display Name – This will be what your recipient will be able to see.
- Mail – the mail id that we registered earlier in SES.
- Username & Password – the credentials that we generated via Amazon SES (IAM User).
Now let's add a service for sending emails using the Mailkit package. Create a new folder called Services and add the following code.
public interface IMailService
{
    Task SendEmailAsync(MailRequest mailRequest);
}public class MailService : IMailService
{
private readonly MailSettings _mailSettings;
public MailService(IOptions<MailSettings> mailSettings)
{
_mailSettings = mailSettings.Value;
}
public async Task SendEmailAsync(MailRequest mailRequest)
{
var email = new MimeMessage();
email.From.Add(new MailboxAddress(_mailSettings.DisplayName, _mailSettings.Mail));
email.To.Add(MailboxAddress.Parse(mailRequest.ToEmail));
email.Subject = mailRequest.Subject;
var builder = new BodyBuilder
{
HtmlBody = mailRequest.Body
};
email.Body = builder.ToMessageBody();
using var smtp = new SmtpClient();
smtp.Connect(_mailSettings.Host, _mailSettings.Port, SecureSocketOptions.StartTls);
smtp.Authenticate(_mailSettings.Username, _mailSettings.Password);
await smtp.SendAsync(email);
smtp.Disconnect(true);
}
}Let's understand the code.
Lines 4-7: We are using the IOptions pattern to inject the configuration from the appsettings into the constructor.
Line 12: Adding From metadata into the email variable.
Line 22: Create a new SMTP client to connect to the host, port, and authentication details from appsettings.
Line 26: Sending email.
Open up the Program.cs class and register the dependencies into the DI Conationer of the ASP.NET Core application.
builder.Services.Configure<MailSettings>(builder.Configuration.GetSection("MailSettings"));
builder.Services.AddTransient<IMailService, MailService>();
Next, let's create a controller named MailsController and wire it up with the service.
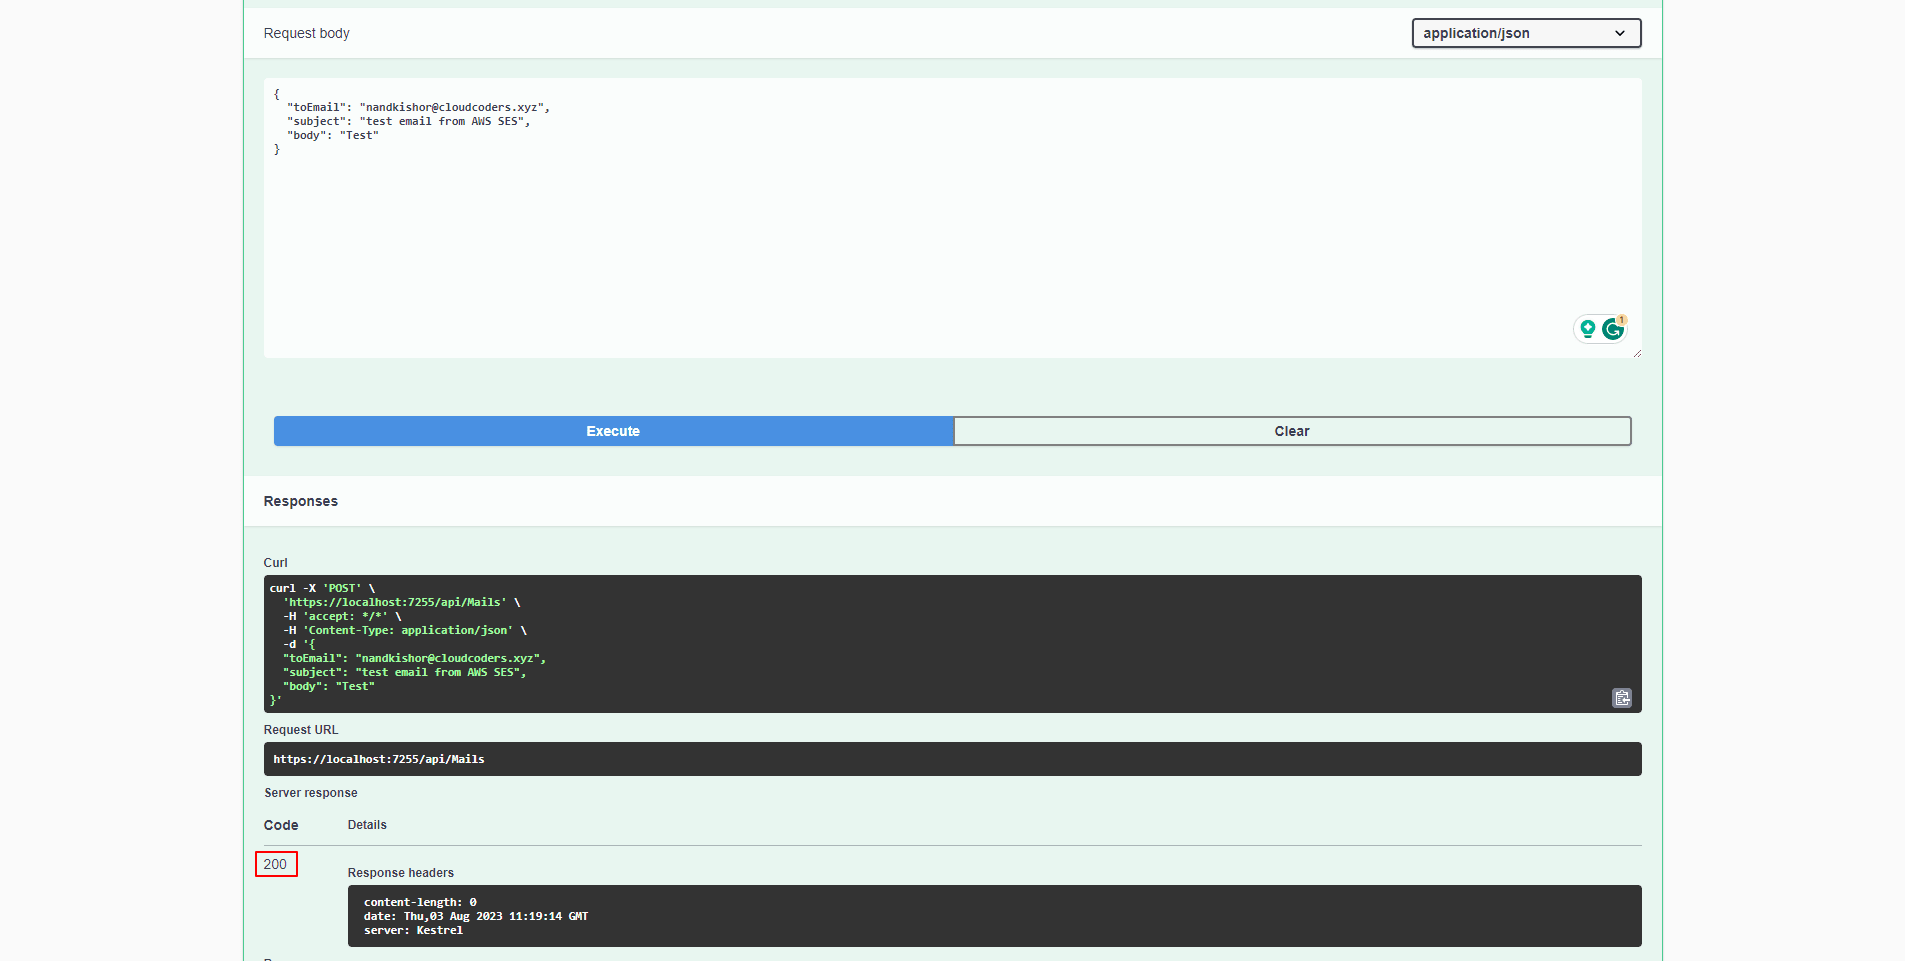
We're going to create a new endpoint (/api/mails) that will call the IMailService's SendEmailAsync function. It's important to note that the endpoint accepts MailRequest as a request and passes it on to the service call, which sends the email via the SMTP client.
[Route("api/[controller]")]
    [ApiController]
    public class MailsController : ControllerBase
    {
        private readonly IMailService _mailService;
        public MailsController(IMailService mailService)
        {
            this._mailService = mailService;
        }
        [HttpPost]
        public async Task<IActionResult> SendMail(MailRequest request)
        {
            await _mailService.SendEmailAsync(request);
            return Ok();
        }
    }
Now run the application and test it using Swagger.

Sending Mail using Amazon SES via AWS SDK for .NET
Now that we have implemented how to send email using Amazon SES via the SMTP interface, let's implement it via the AWS SDK package for .NET.
First, install the following packages in the same project.
install-package AWSSDK.Extensions.NETCore.Setup
install-package AWSSDK.SimpleEmail
Next, add the following in the appsettings.json. Make sure you change the value that is applicable to you.
"AWS": {
  "Profile": "default",
  "Region": "eu-west-1"
}
Now, let's add a new service that uses AWS SDK packages. Create a new class name under the services folder and paste the following code.
public class SESService : IMailService
{
    private readonly MailSettings _mailSettings;
    private readonly IAmazonSimpleEmailService _mailService;
    public SESService(IOptions<MailSettings> mailSettings,
        IAmazonSimpleEmailService mailService)
    {
        _mailSettings = mailSettings.Value;
        _mailService = mailService;
    }
    public async Task SendEmailAsync(MailRequest mailRequest)
    {
        var mailBody = new Body(new Content(mailRequest.Body));
        var message = new Message(new Content(mailRequest.Subject), mailBody);
        var destination = new Destination(new List<string> { mailRequest.ToEmail! });
        var request = new SendEmailRequest(_mailSettings.Mail, destination, message);
        await _mailService.SendEmailAsync(request);
    }
}
This code defines a class named SESService, which is responsible for sending emails using Amazon Simple Email Service (Amazon SES) within an ASP.NET Core application. Let's break down the code step by step:
Lines 3-10: The class has two private fields, _mailSettings and _mailService. The _mailSettings field is of type MailSettings, and the _mailService field is of type IAmazonSimpleEmailService. we are injecting the dependencies of IAmazonSimpleEmailService and the email configuration into the constructor of this service using dependency injection.
Lines 13-15: we create the components needed for the email message using the information provided in the MailRequest parameter. We construct the email's body and subject and then specify the recipient's email address.
Line 16: We create a SendEmailRequest object, which is a part of the Amazon SES SDK. This object is used to send the email and requires the sender's email address, the recipient's email address, and the message content.
Line 17: Finally, we call the SendEmailAsync method of the _mailService field, passing the SendEmailRequest object we created. This asynchronous method is responsible for sending the email using Amazon SES.
Open up the Program.cs class and register the dependencies into the DI Conationer of the ASP.NET Core application.
builder.Services.Configure<MailSettings>(builder.Configuration.GetSection("MailSettings"));
//builder.Services.AddTransient<IMailService, MailService>();

builder.Services.AddDefaultAWSOptions(builder.Configuration.GetAWSOptions());
builder.Services.AddAWSService<IAmazonSimpleEmailService>();
builder.Services.AddTransient<IMailService, SESService>();
Now let's run the application and test it using Swagger as we did above. This time the email will be sent using the SES Service (the AWS SDK package for Simple Email Service).
Conclusion
To conclude, this article provided a comprehensive guide to sending emails with ASP.NET Core using Amazon SES, also known as the Simple Email Service. We covered all aspects of the implementation, and you can access the complete source code here.
If you found this article helpful, don't hesitate to share it with your colleagues. Your support will not only benefit them but also help increase the visibility of my blog. Thank you for reading, and I hope this guide empowers you to leverage Amazon SES for efficient email communication in your ASP.NET Core projects.

