Distributed Caching In ASP.Net 5 - Azure Cache for Redis
we will talk about Distributed Caching, Setting up Redis in the Azure portal using ASP.NET 5, and a small practical implementation too.
In this article, we will talk about Distributed Caching, Redis, Setting up Redis in the Azure portal, Redis Caching in ASP.NET Core, and a small practical implementation too.
https://github.com/nandkishor-yadav/RedisDemoNet5
What Is Distributed Caching In ASP.NET Core?
ASP.NET Core supports not only in-memory application-based cache but also supports Distributed Caching. A distributed cache is something external to the application. It does not live within the application and need not be present in the infrastructure of the server machine as well. A distributed cache is a cache that can be shared by one or more applications/servers.
Like an in-memory cache, it can improve your application response time quite drastically. However, the implementation of the Distributed Cache is application-specific. This means that multiple cache providers support distributed caches. A few of the popular ones are Redis and NCache.
Favorite things with Azure Cache for Redis
- Data is consistent throughout multiple servers.
- Multiple Applications / Servers can use one instance of Redis Server to cache data. This reduces the cost of maintenance in the longer run.
- The cache would not be lost on server restart and application deployment as the cache lives external to the application.
- It does not use the local server’s resources.
IDistributedCache Interface
This is the interface you need, to access the distributed cache objects. IDistributedCache Interface provides you with the following methods to perform actions on the actual cache.
- GetAsync – Gets the Value from the Cache Server based on the passed key.
- SetAsync – Accepts a key and Value and sets it to the Cache server
- RefreshAsync – Resets the Sliding Expiration Timer (more about this later in the article) if any.
- RemoveAsync – Deletes the cache data based on the key.
What Is Redis?
Redis is an open-source data store that is used as a database, cache / messaging broker. It supports quite a lot of data structures like strings, hashes, lists, queries, and much more. It’s a blazing fast key-value-based database that is written in C. It’s a NoSQL Database as well, which is awesome. For these purposes, it is being used at tech giants like Stackoverflow, Flickr, Github, and so on.
In the long term, it lets you save a lot of money.
In our context, Redis is a great option for implementing a highly available cache to reduce the data access latency and improve the application response time. As a result, we can reduce the load off our database to a very good extent.
Setting Up Redis On Azure Portal
You'll need an Azure subscription before you begin. If you don't have one, create a free account first.
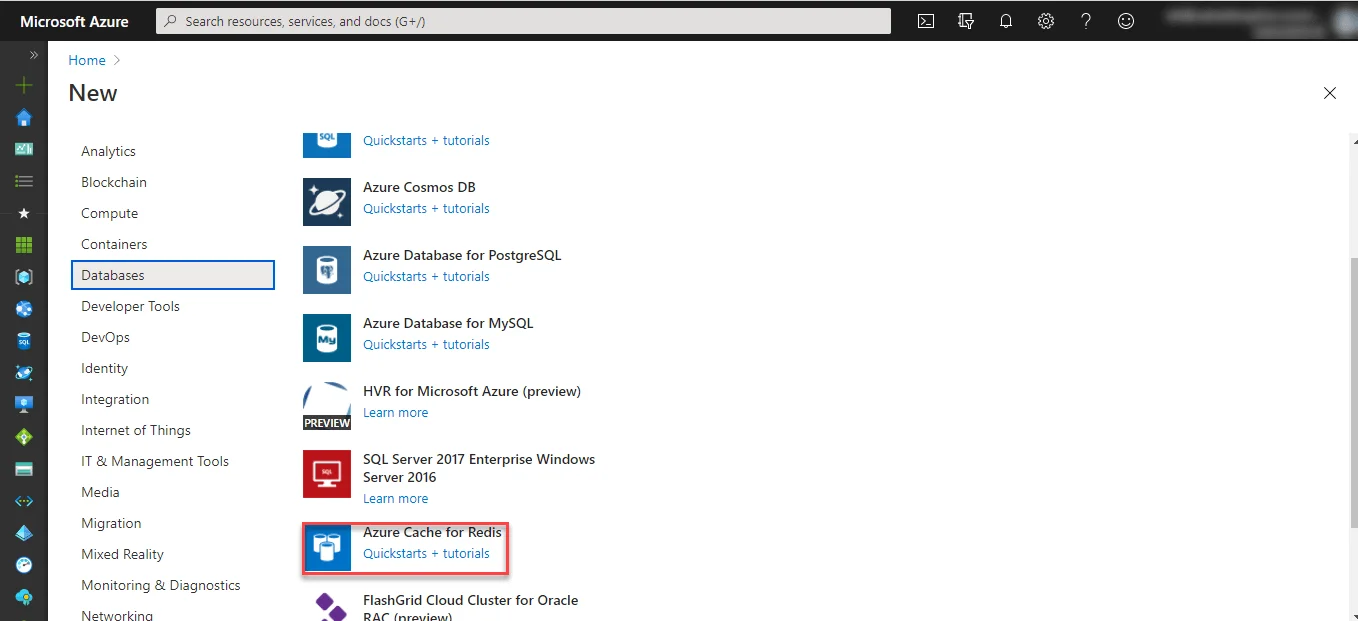
To create a cache, sign in to the Azure portal and select Create a resource.

On the New page, select Databases and then select Azure Cache for Redis.
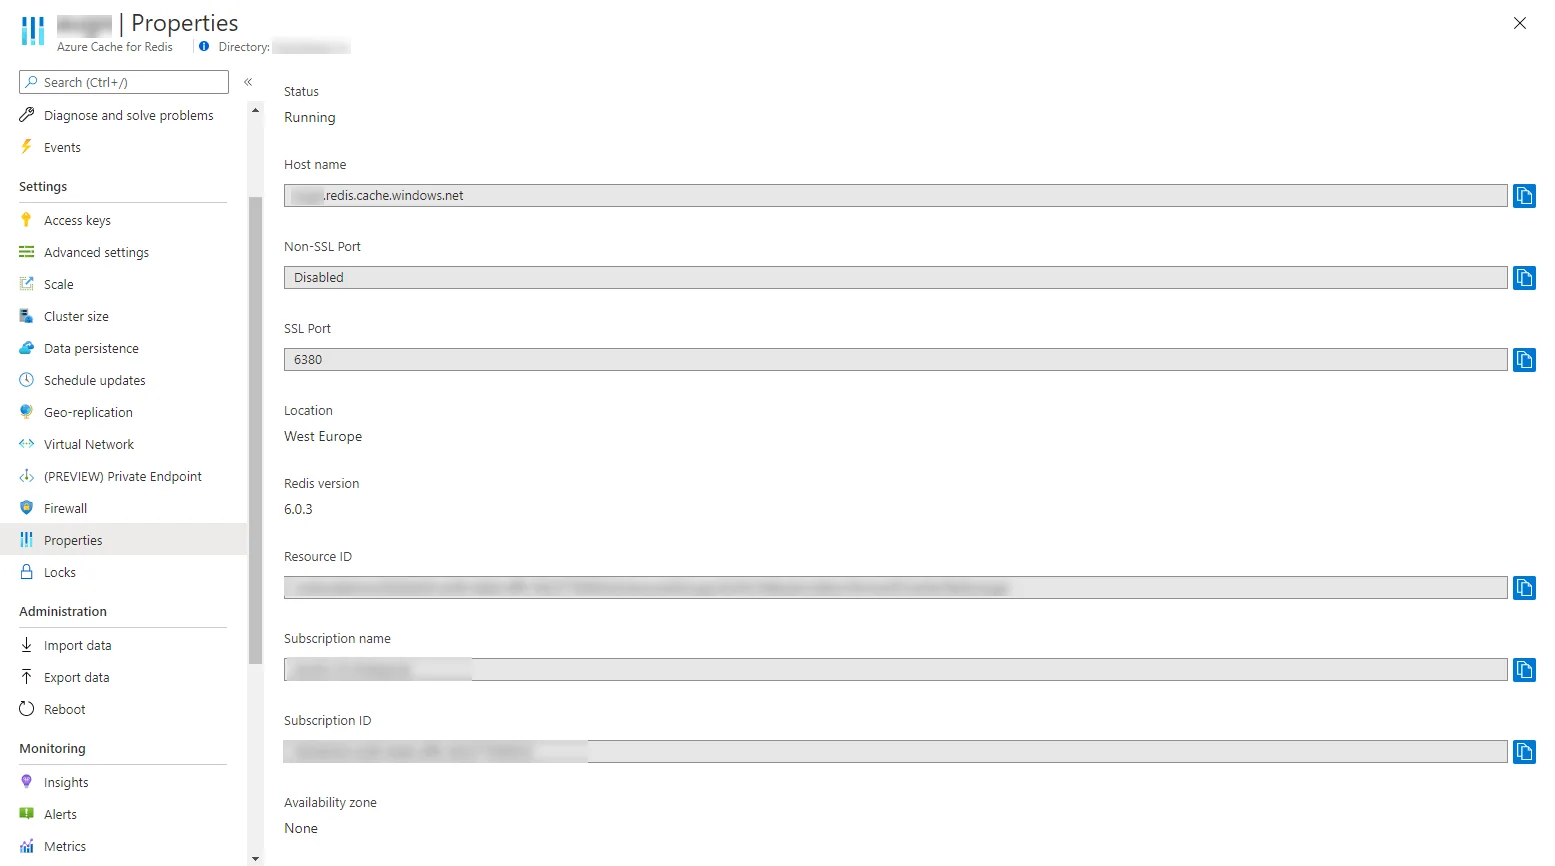
To connect to an Azure Cache for Redis instance, cache clients need the hostname, ports, and a key for the cache. Some clients might refer to these items by slightly different names. You can get the hostname, ports, and keys from the Azure portal
To get the access keys, from your cache left navigation, select Access keys.

To get the hostname and ports, from your cache left navigation, select Properties. The hostname is of the form <DNS name>.redis.cache.windows.net.
Using Redis with C# .NET Core
While using Redis programmatically can happen a few different ways, one of the things I regularly do is hook up any of my APIs to it where I see fit.
In this example, I've got a .NET Core 5 API (C#), and here's what's needed to wire things up.
- Install NuGet package Microsoft.Extensions.Caching.StackExchangeRedis

- Install NuGet package StackExchange.Redis

- Wire up your service connection to Redis from the Startup.cs file as such:
To wire up the connection, navigate to startup.cs/ConfigureServices method and add the following.
        public void ConfigureServices(IServiceCollection services)
        {
            ////code removed for brevity

            services.AddStackExchangeRedisCache(options =>
           {
               options.Configuration = Configuration.GetConnectionString("RedisCache");
               options.InstanceName = "redisDemo_/";

               options.ConfigurationOptions = new ConfigurationOptions()
                {
                    ConnectRetry = 3,
                    ReconnectRetryPolicy = new LinearRetry(1500)
                };
           });
        }
Retry guidance with StackExchange.Redis
Many services can be throttled for a variety of reasons, and there are additional reasons why a request isn't fulfilled, such as a network connection difficulty at the moment, etc. This is also true for Azure Cache for Redis, and you should always use a retry pattern for your queries as a best practice. Specifically the ConnectRetry and ReconnectRetryPolicy properties. I'm defining that I want to retry 4 times, with 3-second intervals. So if my initial request fails, it will automatically try again a few times.
The connection string of the Azure Redis cache is taken from the appsettings.json file.
{
  "ConnectionStrings": {
    "RedisCache": "demo.redis.cache.windows.net:6380,password=<YOUR-PASSWORD>=,ssl=True,abortConnect=False"
  },
  "Logging": {
    "LogLevel": {
      "Default": "Information",
      "Microsoft": "Warning",
      "Microsoft.Hosting.Lifetime": "Information"
    }
  },

  "AllowedHosts": "*"
}
Let's add a new extension generic method that will make our life a bit easier when it comes to get or set the records from the Redis server. It has two methods, SetRecordAsync sets the data in the cache while GetRecordAsync will get the data. We can pass configuration value in the DistributedCacheEntryOptions. What this does is, this will set how long the items will stay in the cache.
AbsoluteExpirationRelativeToNow - It gets or sets an absolute expiration time, relative to the current date and time.
SetSlidingExpiration – This is similar to Absolute Expiration. It expires as a cached object if it is not being requested for a defined amount of time period. Note that Sliding Expiration should always be set lower than the absolute expiration.
using Microsoft.Extensions.Caching.Distributed;
using System;
using System.Text.Json;
using System.Threading.Tasks;

namespace RedisDemo.Extensions
{
    public static class DistributedCacheExtensions
    {
        public static async Task SetRecordAsync<T>(this IDistributedCache cache,
              string recordId,
              T data,
              TimeSpan? absoluteExpireTime = null,
              TimeSpan? unusedExpireTime = null)
        {
            var options = new DistributedCacheEntryOptions
            {
                AbsoluteExpirationRelativeToNow = absoluteExpireTime ?? TimeSpan.FromSeconds(60),
                SlidingExpiration = unusedExpireTime
            };

            var jsonData = JsonSerializer.Serialize(data);
            await cache.SetStringAsync(recordId, jsonData, options);
        }

        public static async Task<T> GetRecordAsync<T>(this IDistributedCache cache, string recordId)
        {
            var jsonData = await cache.GetStringAsync(recordId);

            if (jsonData is null)
            {
                return default(T);
            }

            return JsonSerializer.Deserialize<T>(jsonData);
        }
    }
}
Now, let's use IDistributedCache to access the configured Cache. We can inject this into CityController Constructor. With this in place, let's configure the Get() method in the CityController.
using Microsoft.AspNetCore.Mvc;
using Microsoft.Extensions.Caching.Distributed;
using RedisDemo.Extensions;
using RedisDemo.Interface;
using RedisDemo.Models;
using System;
using System.Collections.Generic;
using System.Threading.Tasks;

namespace RedisDemo.Controllers
{
    [Route("api/[controller]")]
    [ApiController]
    public class CityController : ControllerBase
    {
        private readonly IEfRepository<City> _cityRepository;
        private readonly IDistributedCache _cache;
        public CityController(IEfRepository<City> cityRepository, IDistributedCache cache)
        {
            _cityRepository = cityRepository;
            _cache = cache;
        }

        // GET: api/<CityController>
        [HttpGet]
        public async Task<IActionResult> Get()
        {
            string recordKey = "CitiesList_" + DateTime.Now.ToString("yyyyMMdd_hhmm");

            var cities = await _cache.GetRecordAsync<List<City>>(recordKey);

            if (cities is null)
            {
                cities = (List<City>)await _cityRepository.ListAllAsync();

                await _cache.SetRecordAsync(recordKey, cities);
            }

            return Ok(cities);
        }
    }
}
In the above snippet, we first set the key for the record, so that when we hit the method, it first checks if the key has a value in Redis. If the value exists in Redis then it simply responds to data and if the value does not exist in Redis, then get the data from our database via efcore and set the value to the Redis.
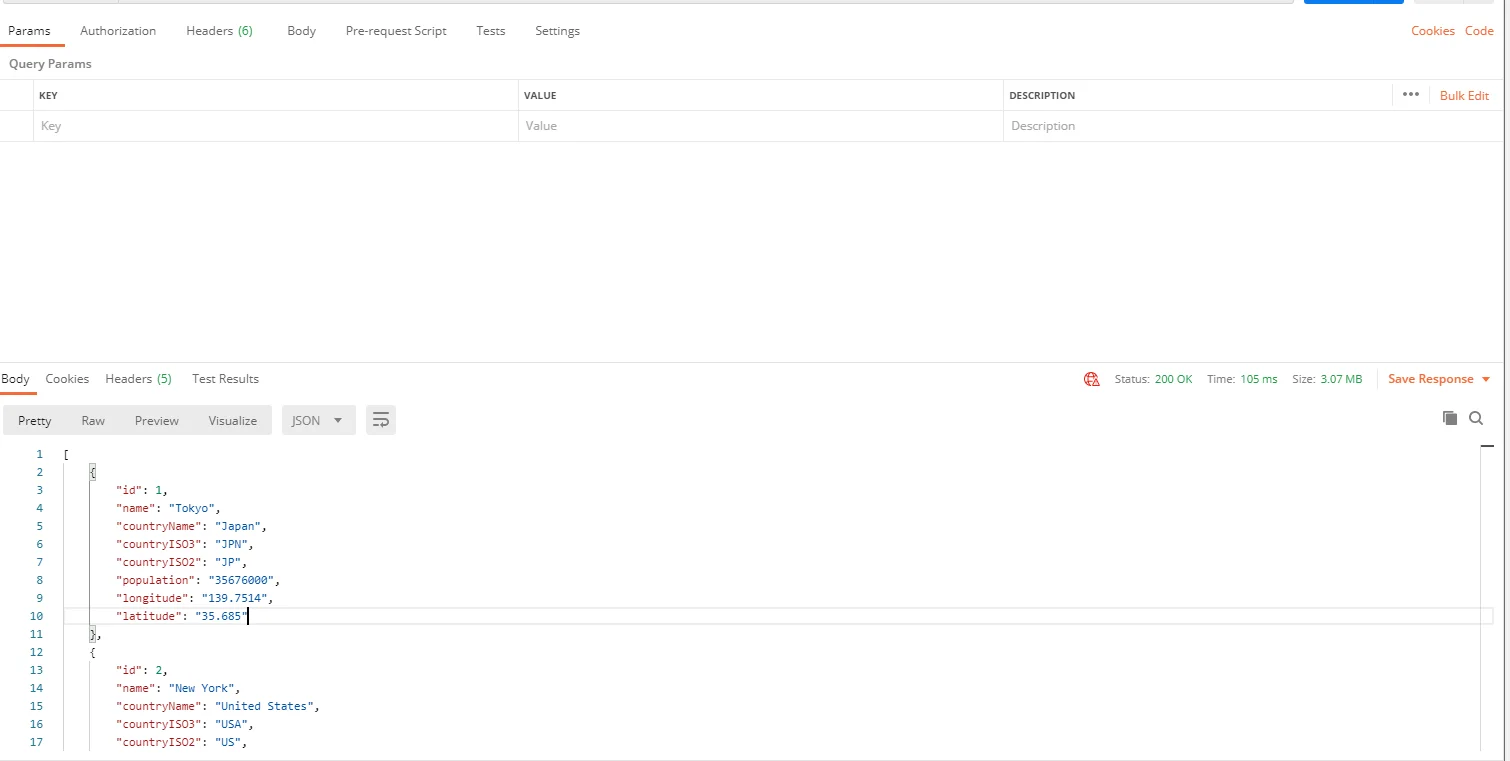
Let's test our implementation via postman now. The first call will take a longer time. The second call will be faster as the data will be returned from the Redis cache. We are trying to pull 30000s of records.
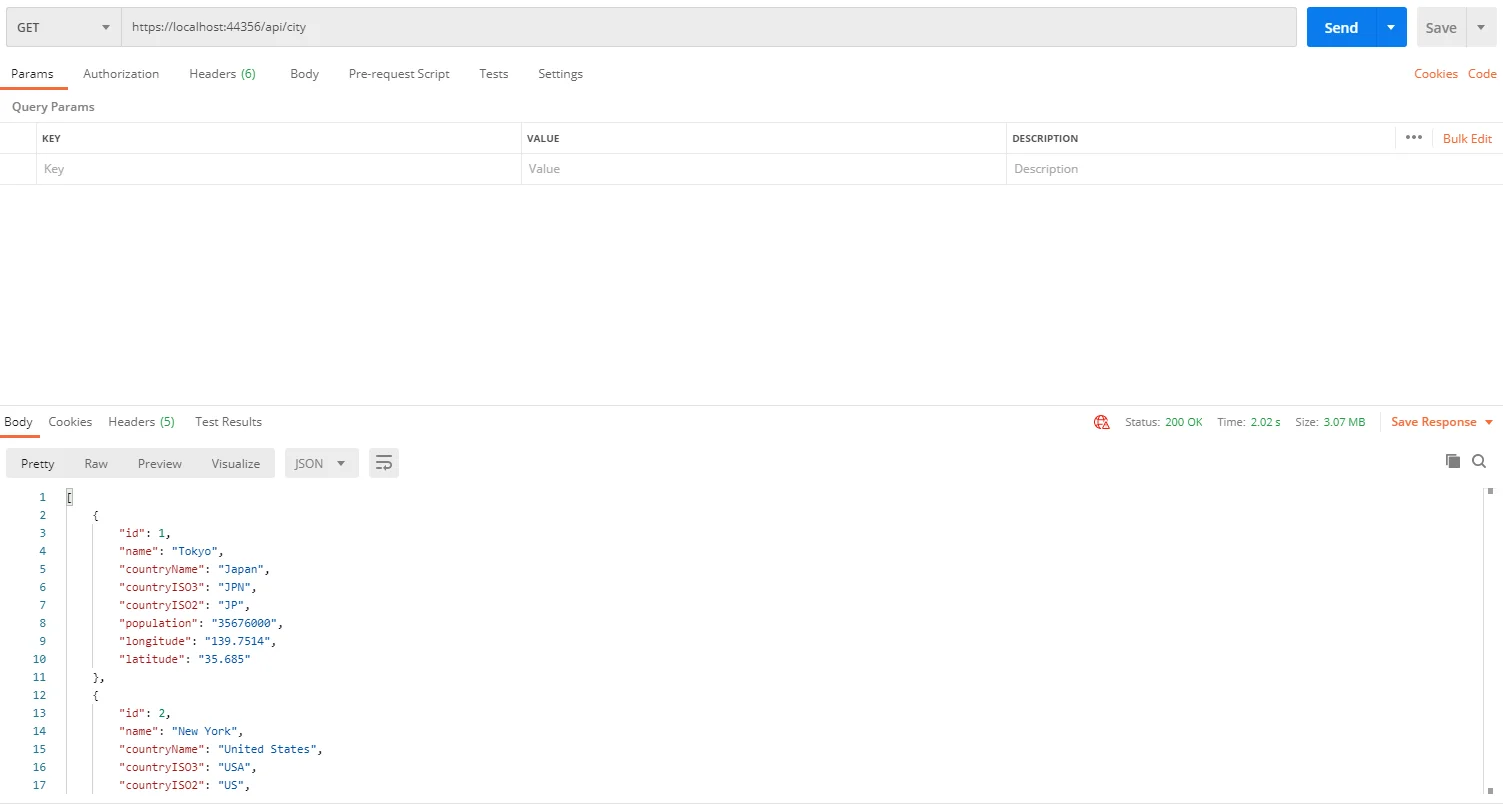
The first call took about 2 seconds. The second call should take significantly less time as it would directly hit the Redis.
Redis CLI Commands
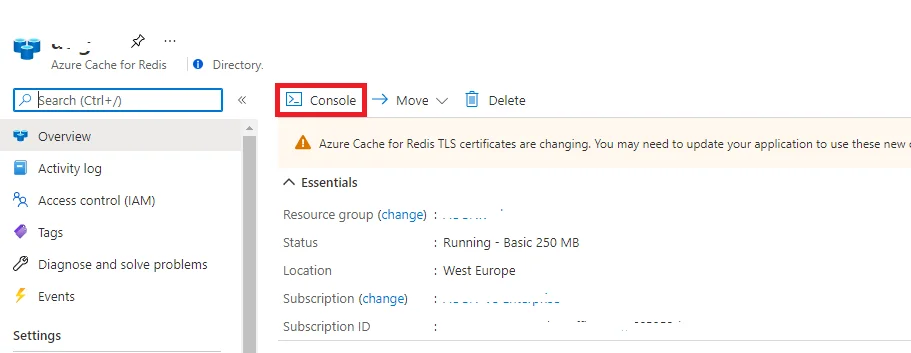
With a Redis server, you get the capability to run commands to interact with the cache. In Azure Cache for Redis, you can also do this. Here's how.
From the Azure Portal, go to your Redis resource and you will see a Console button on the overview page:
This brings up the console, and you can execute any commands you would like.
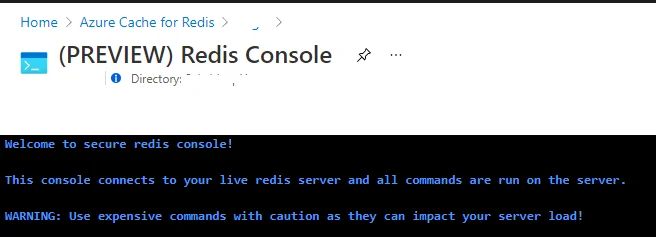
See a list of Redis commands here https://redis.io/commands
The second call only took 105ms. That's quite a lot of response time saved. By now, you can understand the need to implement caching in all your applications.
I hope you learned something new and detailed in this article. If you have any comments or suggestions, please leave them behind in the comments section below. Do not forget to share this article within your developer community. Thanks and Happy Coding!
